Ok this post it late but I had it in draft! Maybe you will like it anyway! I sure hope so!
A Christmas wedding! Beautiful, fluffy white snowflakes, a crackling fire, a cozy gathering of friends and family.... what a beautiful month to have a wedding! Two of the sweetest, kindest people I know are starting their lives as husband and wife within the next week. Teej and Ben go together like sugar and spice!
My daughter Danielle and I got a little something for them and I wanted to do something special for the wrapping so I thought I would share it with you. I think it turned out ok, you know...you learn after the first time! :)
I go to Bible Study with Teej (love that name!) and Ben and so I had asked them to let me take a photo of them after one of the studies. Being the sweethearts they are, they said sure!
I took the photo and switched it up a bit and made it into a gift wrap. Maybe it can inspire you to think of new ways to wrap!
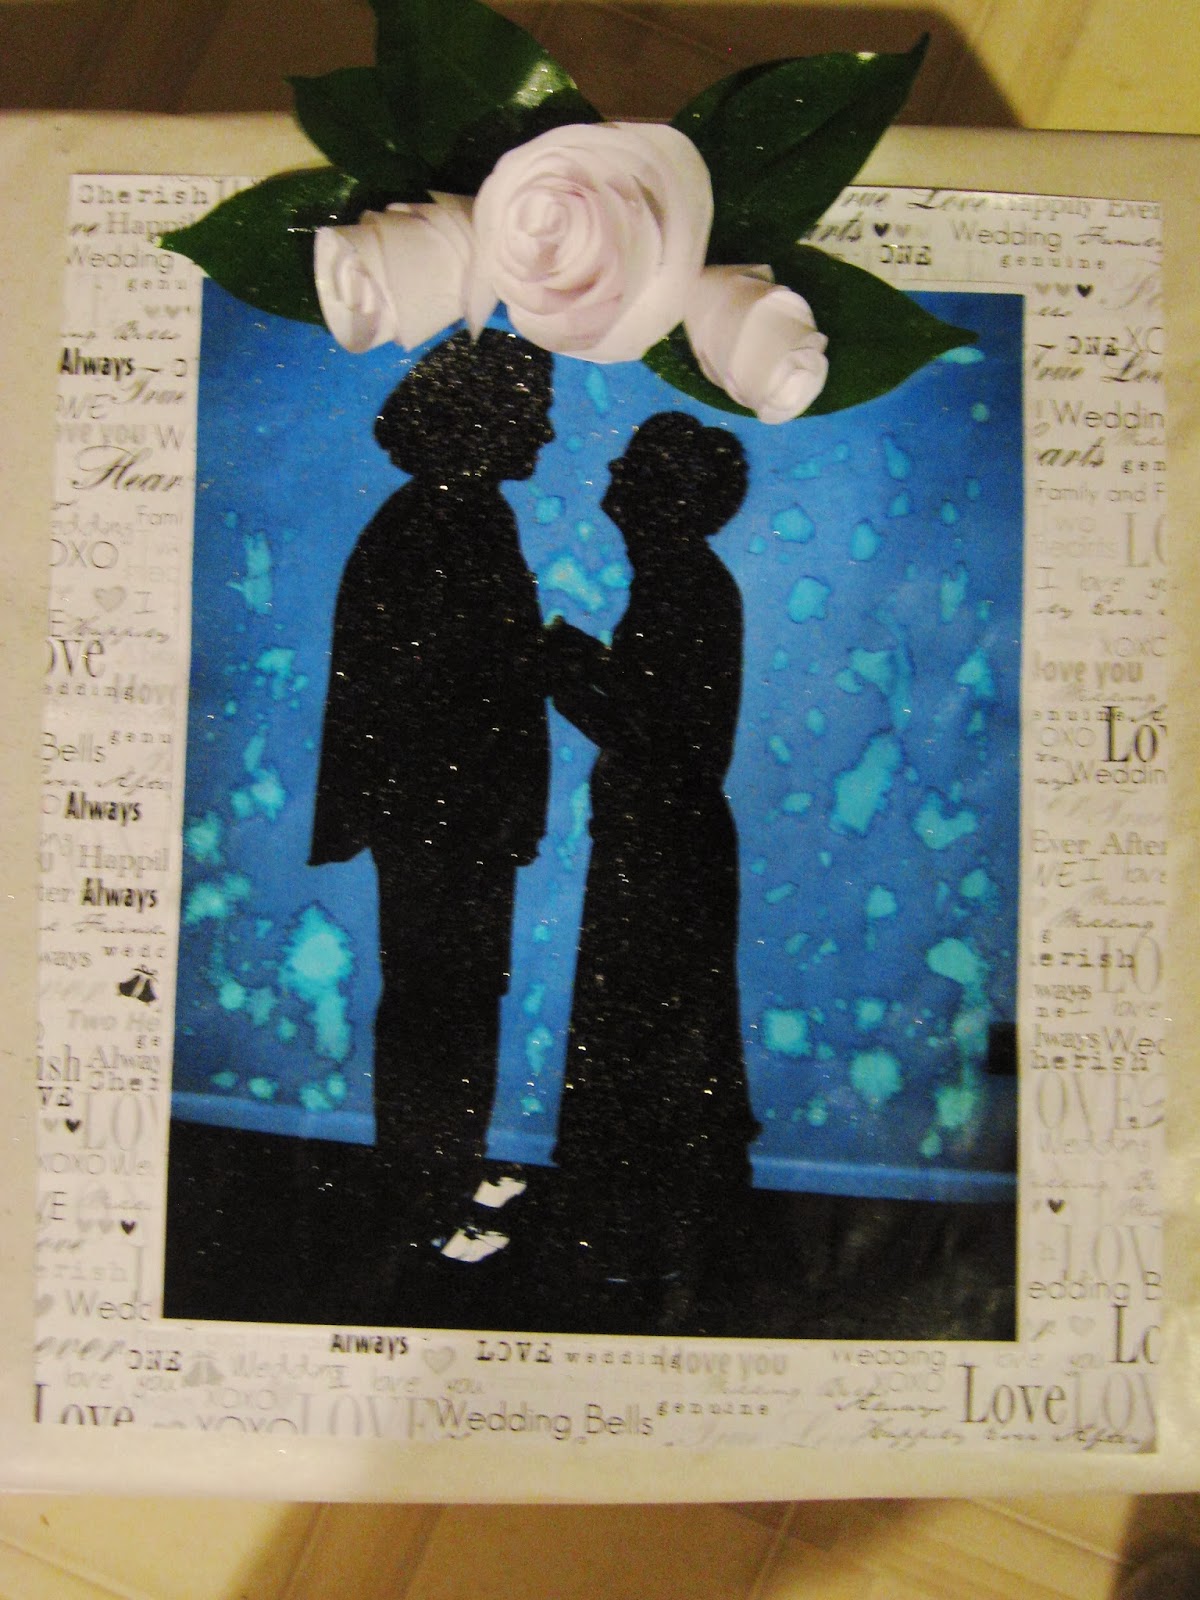 |
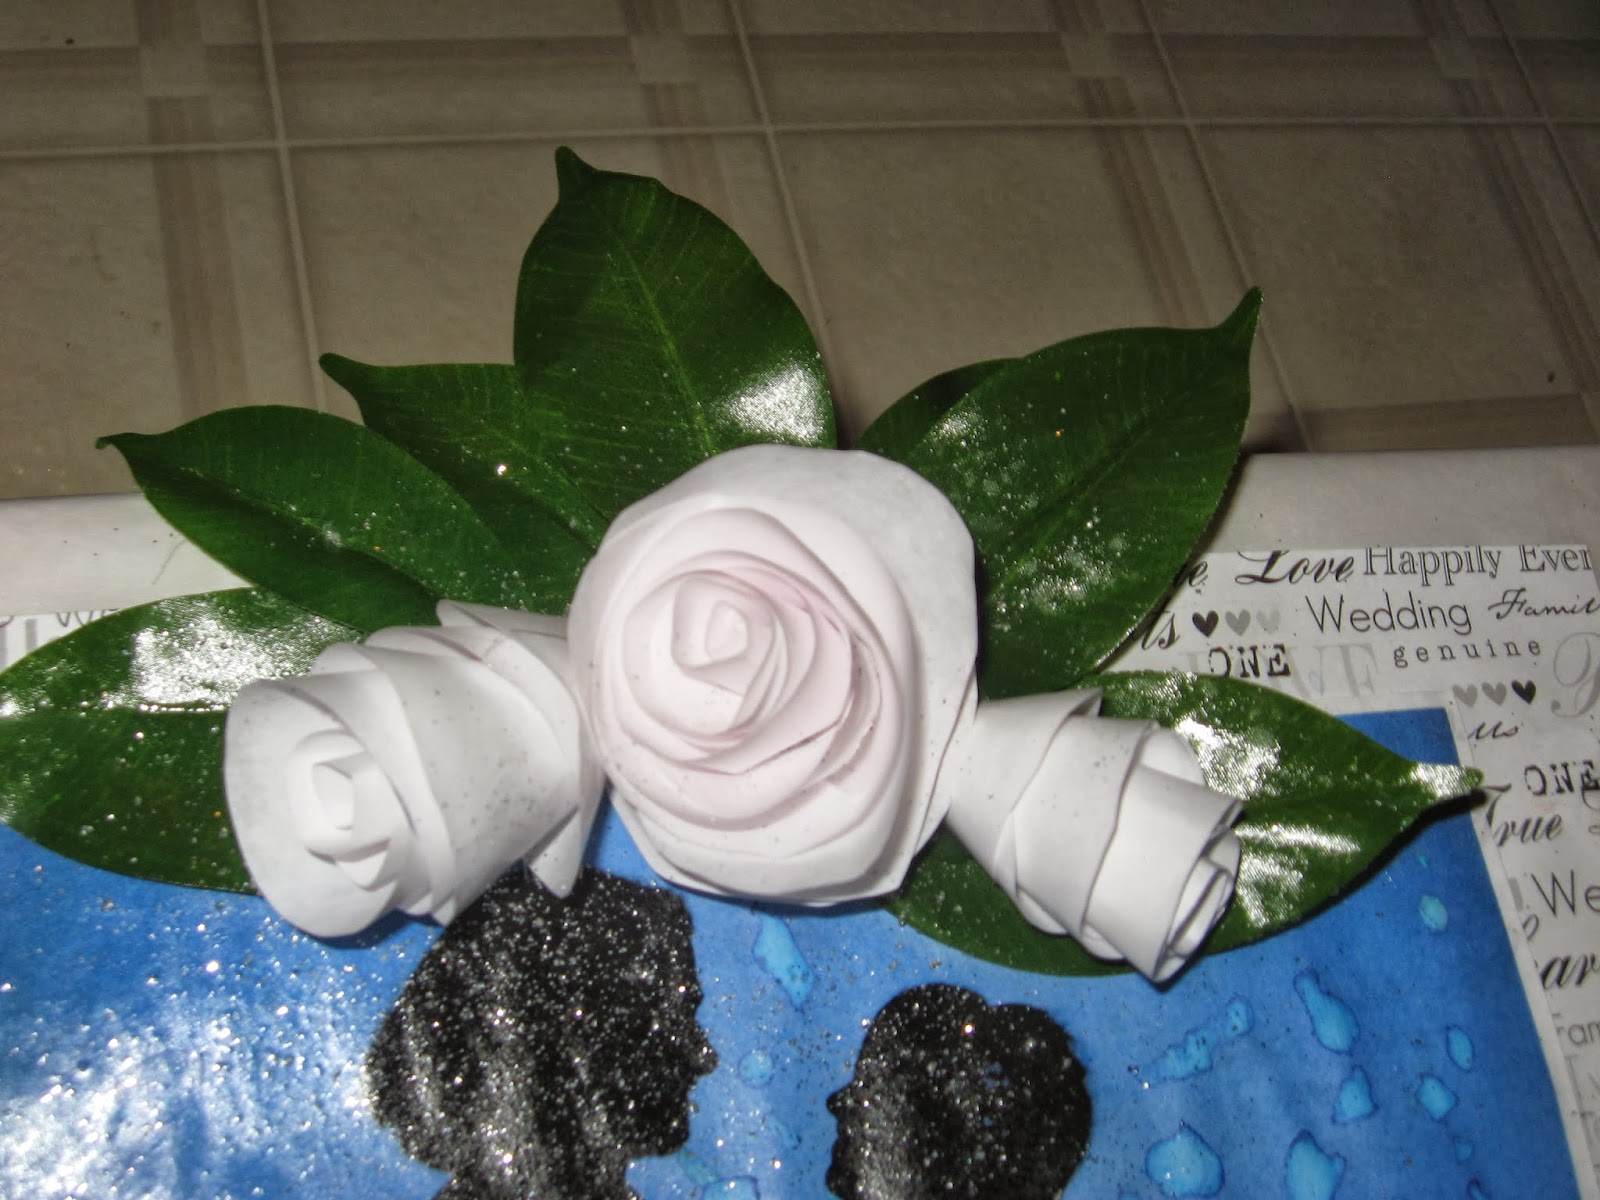
I made their photo into a silhouette and left the shoes and part of her headband (can't really see it) in white and black.
They loved it, she thought it looked like something from Disney land princess! I was glad, they are so special! I also added some sparkle on top! |
These roses are just computer paper, cut into rounds the size of margin lids for the large, full rose and smaller lids for the buds. Then cut a spiral from the outer edge in leaving about 1-2" in the center. Roll from the outer edge to the middle and hot glue to the 1-2" base! It's that EZ! If you need more instructions just let me know, it is one of the prettiest, fastest and available decorations for a package you could ask for and it will work for any occasion!
The reason for the season
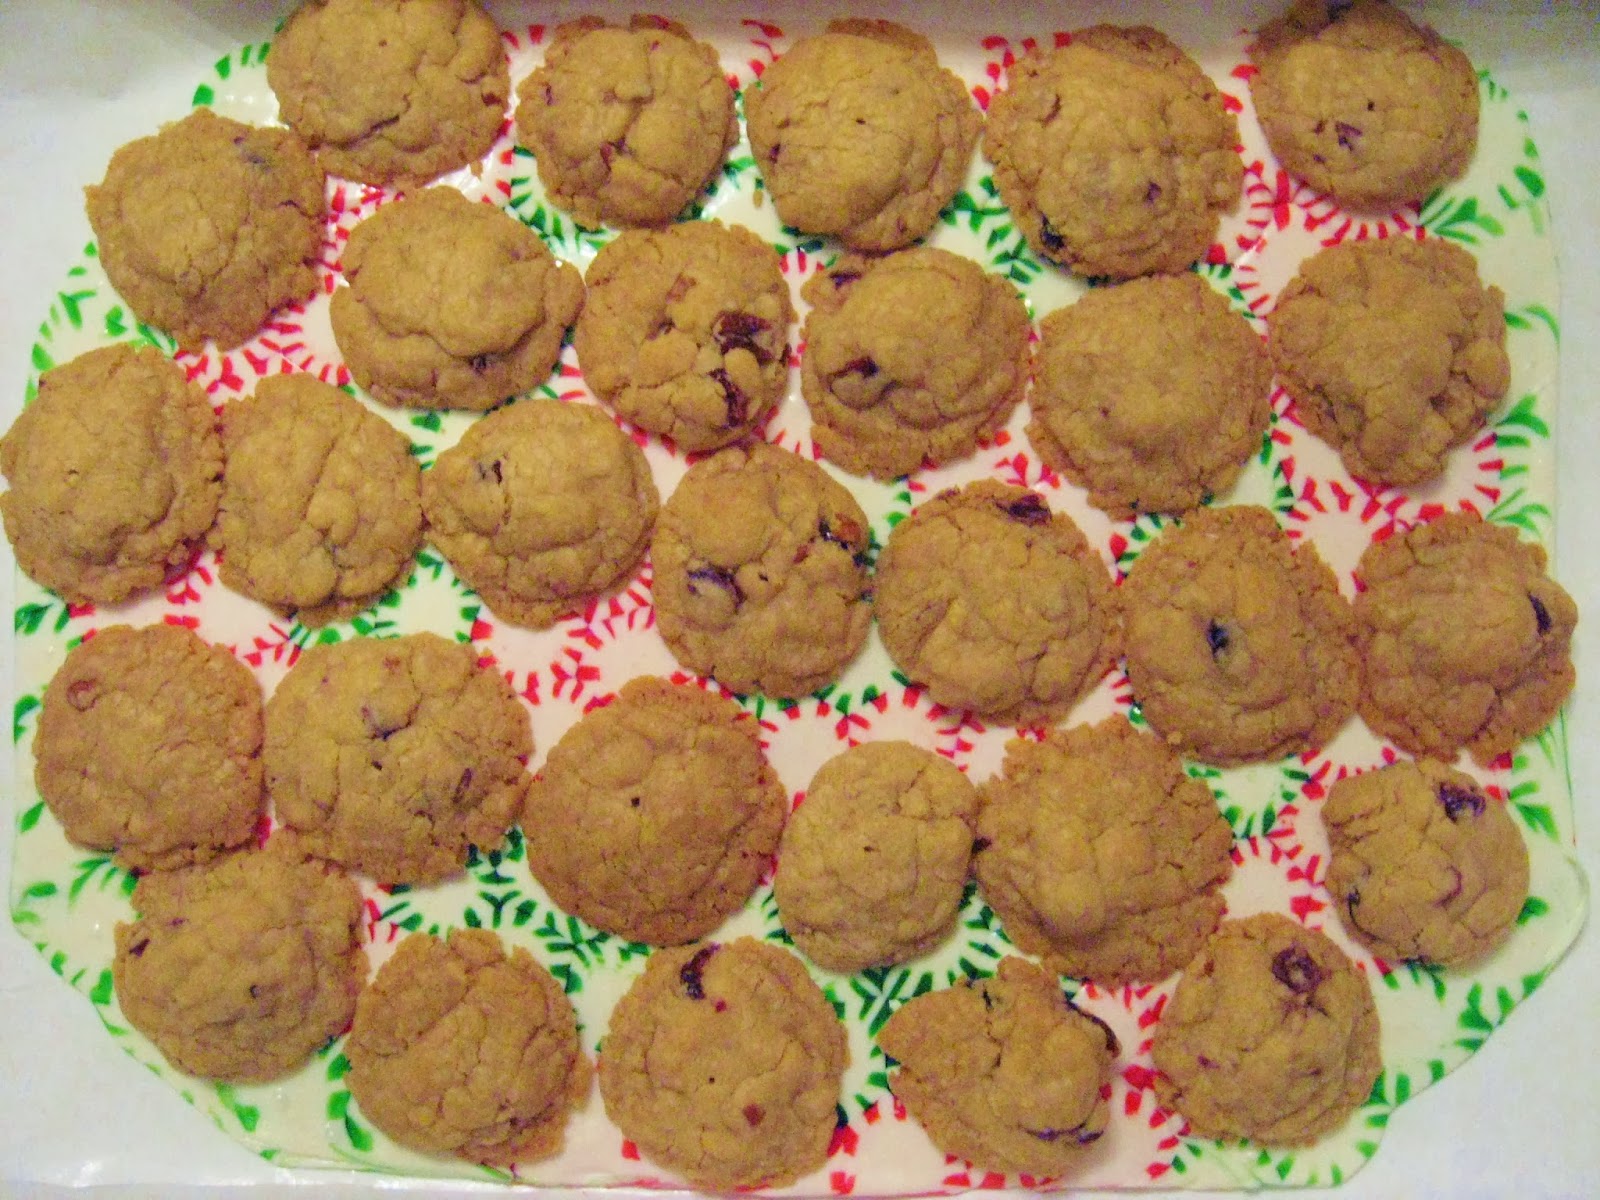
Then of course I had to try a few of the pinterest ideas, no sense collecting them if you are not going to use them! This is an edible tray made from $1 store candies, you know the kind and at Christmas they have green ones too! Just snip off the top of the wrappers and place them next to each other in a desired pattern. It could be a Christmas tree, a Cross, or a random design like mine! Bake in a 350 degree oven for about 8 minutes. I suggest you put it into a pan as close to the size you want the tray to be, as the candy that is on the outside "thins" out a bit. Let cool and....
You have a great serving platter! I have been told you can seal it with a spray and keep it from year to year but it was so inexpensive I didn't want to try that. (Plus you can break off pieces from it and put into your hot tea for a mint tea taste, yummmm! It doesn't make the food taste like mint and it is studier than you might think!
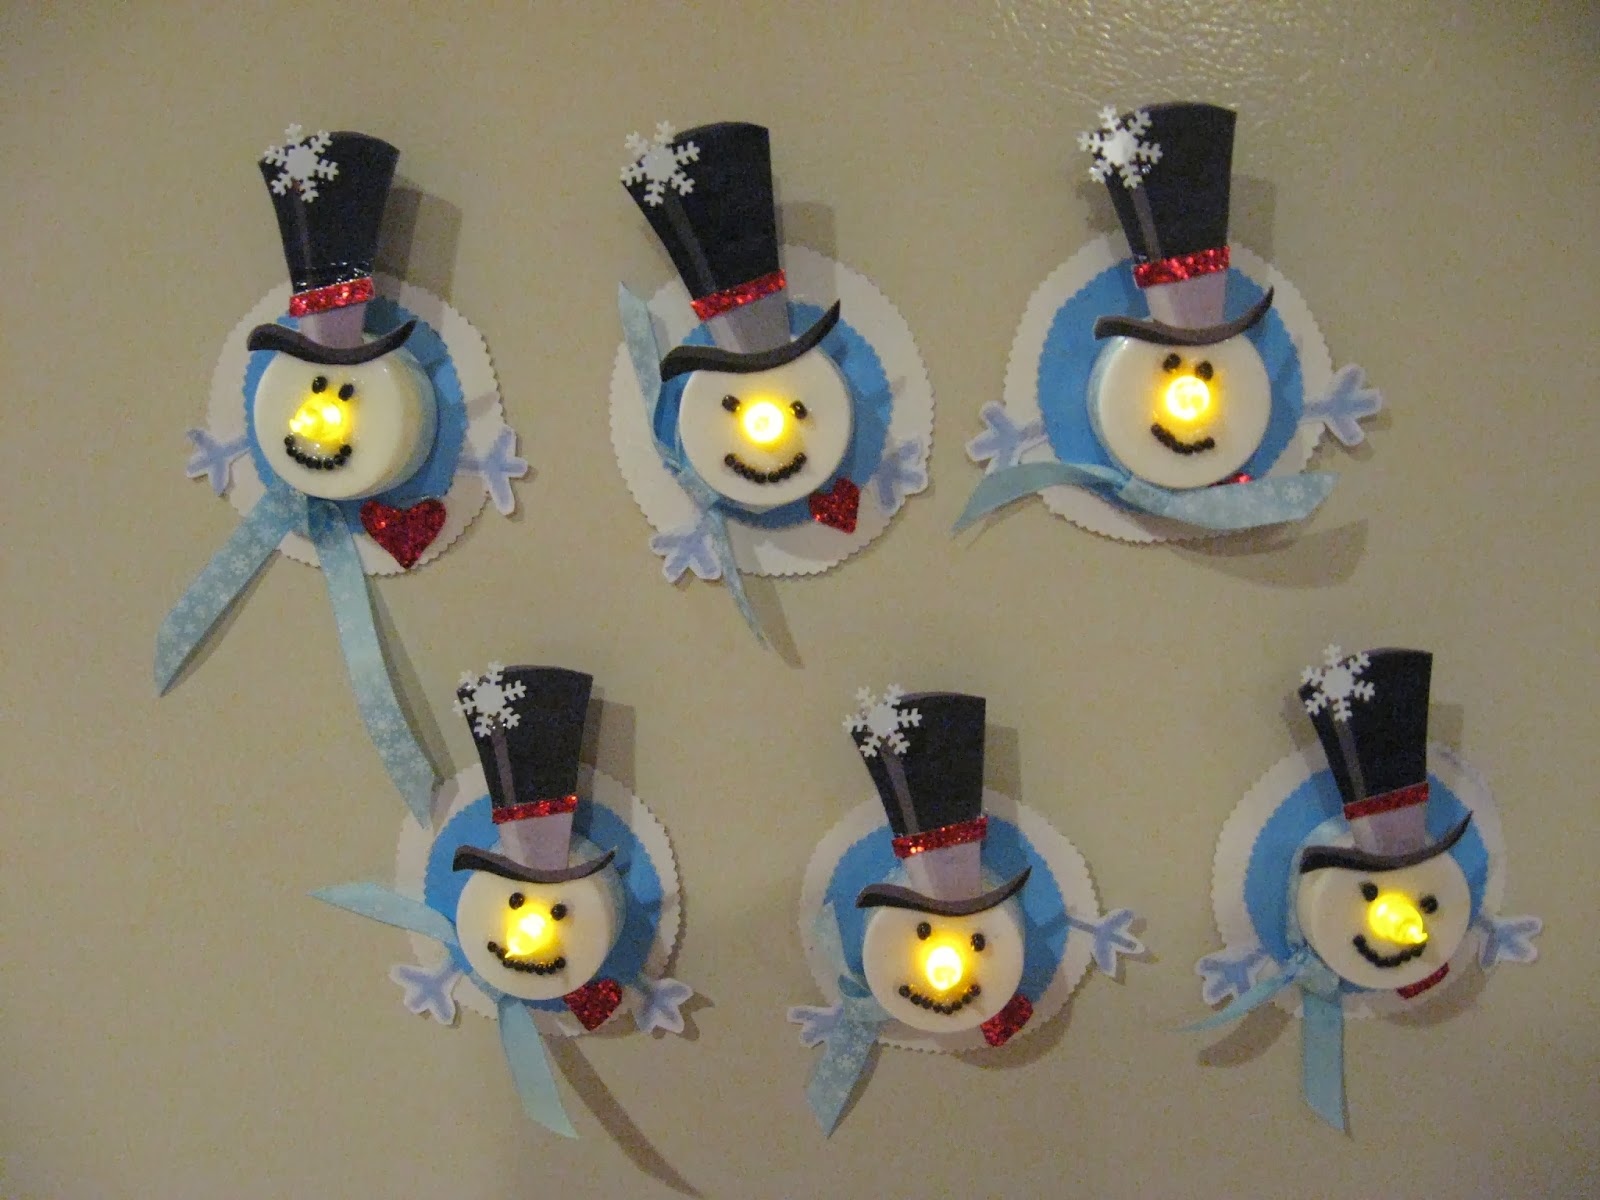
Another idea I had seen floating around on Pinterest were snowmen tealights! How cute are they! You can purchase 2/$1 tealights at the Dollar Store and I just used a template for the hat I had searched the internet for, printed it off and mounted it with adhesive to black foam core board so it would be sturdy. The backs are just poster board and then ribbon of your choice tied around the neck for a "scarf"! A package of plastic snowflakes to add to the hat, a single sheet of glitter paper for the heart and the hat band. For the arms I just found a printable snowflake online and printed it and cut it apart. The pieces looked like "twig" arms! A fun afternoon project! Tip: Have all your supplies laying out before you start, it will go a lot quicker and be more fun!
Also be sure on the back white poster board and the blue back poster board to cut out the place for the on/off switch if you want his nose to glow! Oh yes and I did put a bit of orange marker on his nose, it was just too light. But it would be really cute with a darker orange! Add a piece of self sticking magnet to the back and you are done!
They light up really well! A fun refrigerator magnet for the season! (Not to mention a great night light in case you get the munchies!)
Well, here I am posting Christmas things and it is almost Valentine's. I need to get with it!
Remember, it's all fun and games until someone comes up with an idea!
then it is ez4u2do!
Hugs!
Debbie